Showing posts with label deutsch. Show all posts

Monday, 23 May 2011

What women crafted 107 years ago

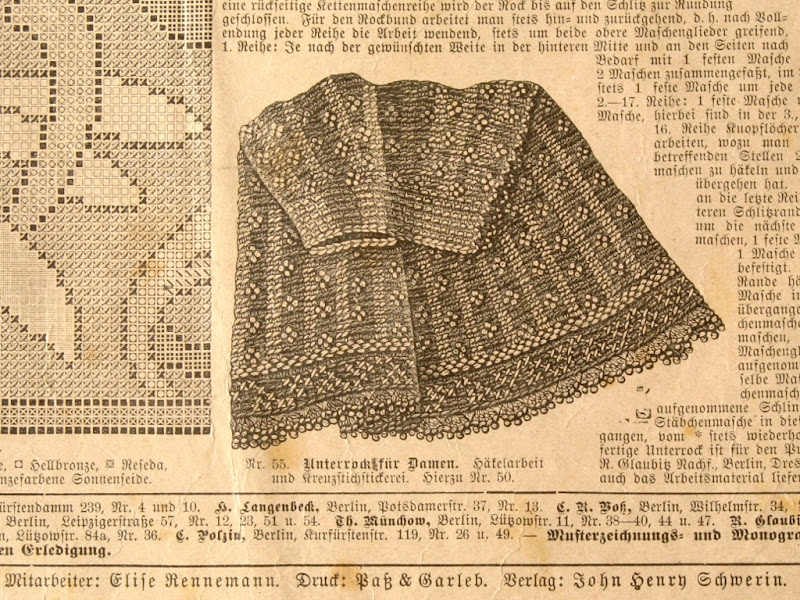
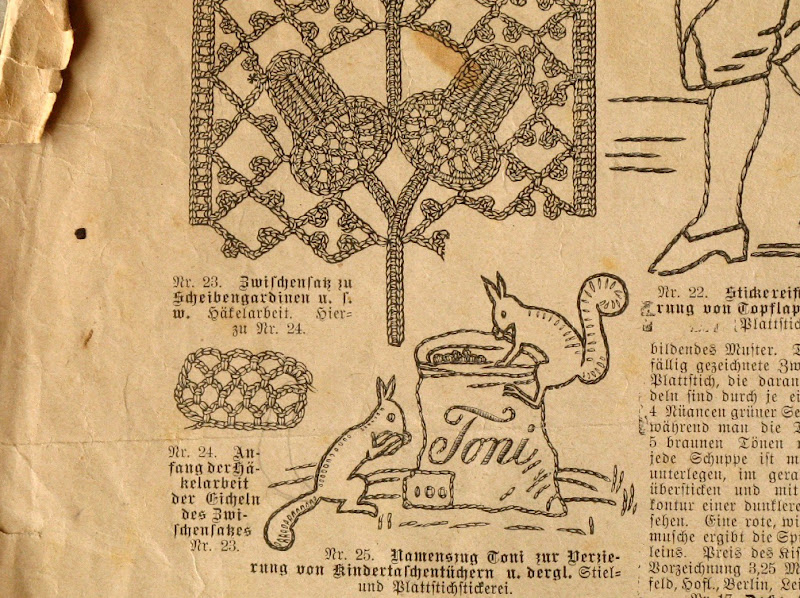
Came across an antique German craft magazin called Frauen-Fleiss (Women's Diligence) from 1904 and I just have to share some of those fabulous art nouveau style designs and patterns.
It appears to be a tabloid size magazine on four pages, published quarterly since 1893, possibly a supplement of some newspaper.

Frauen-Fleiss

Bin seit kurzem in den Besitz einer alten Handarbeitszeitung "Frauen-Fleiß" von 1904 bekommen und einfach muß einige von diesen wunderbaren Handarbeiten im Jugendstil vorstellen.
Diese Zeitung auf vier Seiten wurde offensichtlich seit 1893 von Verlag John Henry Schwerin veröffentlicht, möglicherweise als eine Beilage zu irgendeiner größeren Zeitung.

Die Zeitung hat insgesamt 53 Anleitungen, meistens für Stickereien, Näh- und Häkelarbeiten, aber ebenso für einen Behälter für Postkarten in "modernem Kerbschnitt" und für einen Palmenkübel als Tiefbrand-Modellierarbeit.
Es gab noch einen Extra-Bogen mit Musterzeichnungen für größeren Arbeiten, den mußte man von der Redaktion zusätzlich kaufen.


There are 53 instructions for sewing, embroidery, crochet and other needlework, but also for a wooden postcard storage box and a decorated flower pot to be made of clay.

Frauen-Fleiss

Frauen-Fleiss

Frauen-Fleiss

Frauen-Fleiss

Frauen-Fleiss

Frauen-Fleiss

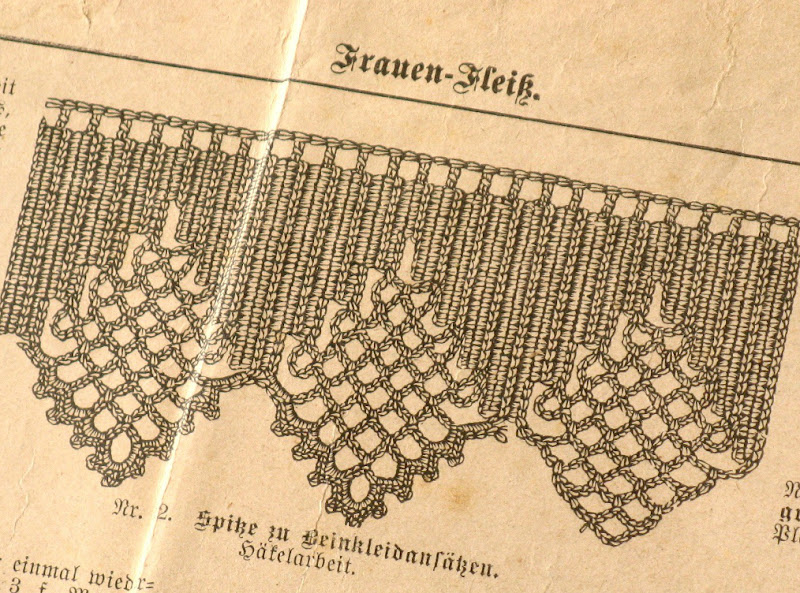
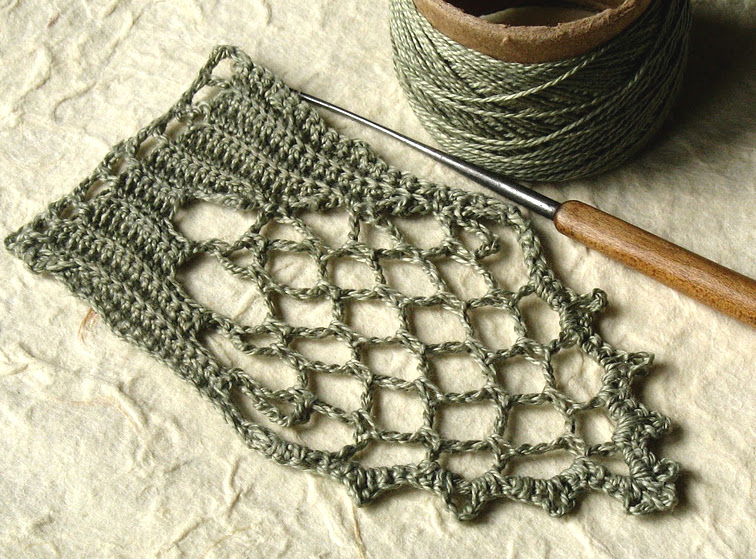
This last crochet lace edging seemed the easiest piece in the collection and the pattern quite understandable to my surprise, so this is my small sample with one motif:

Häkelspitze im Jugendstil

Not sure, if everything turned out the way it was supposed to, but it looks art nouveau enough to me. The only thing missing now is a dress on where to sew it.


Sunday, 5 December 2010

Confitería gift bag pattern

Sometimes it is not about what you give as a gift, but the good thoughts and wishes behind it and how it's presented. Lots of warmth can be added by making the gift wrap with your own hands, therefore I designed a small pouch to knit just before Christmas.
With sport weight yarn the bag will be approximately 8 cm or 3 inches in diameter. And you can easily turn the pouch into a bottle cozy by knitting it taller.

Für deutsche Anleitung bitte runter scrollen!


Material:
• Yarn approximately 20 g/0.7 oz, tension 22-26 st per 10 cm/4 in
  (cotton works best, wool might be too soft to stay in shape)
• Double pointed needles 3 mm/US 2½
• Ribbon

*...* – repeat the pattern between asterisks

A
Cast on 48 stitches.
Rd 1, 3 Purl all stitches
Rd 2 Knit all stitches
B
Rd 4 *k1, yo, k2, sl2 knitwise, k1, p2sso, k2, yo*
Rd 5, 7, 9 Knit all stitches
Rd 6 *k2, yo, k1, sl2 knitwise, k1, p2sso, k1, yo, k1*
Rd 8 *k3, yo, sl2 knitwise, k1, p2sso, yo, k2*
C
Rd 10 *k4, yo, k1, k2tog, k1*
Rd 11, 13, 14, 15 Knit all stitches
Rd 12 *k1, sl1, k1, psso, k1, yo, k1, yo, k1, k2tog*
Repeat rounds 10-15 six times or until desired height of the bag.
D
Rd 16 *k3, sl2 knitwise, k1, p2sso, k2*
Rd 17 *p3, k1, p2*
Rd 18 Knit all stitches
Work rounds 17 and 18 alternatively for seven rounds.
Rd 19 *k2, sl2 knitwise, k1, p2sso, k1*
Rd 20, 22 *p2, k1, p1*
Rd 21 Knit all stitches
Rd 23 *k1, sl2 knitwise, k1, p2sso*
Rd 24 *p1, k1*
Rd 25 *k2tog*
Pull the yarn through the remaining stitches, fasten and weave in the ends. Wash and block on a jar, if necessary. Add a ribbon through the holes of round 8.


The knitting chart:


Notes:
Found a great video tutorial on the double decrease or sl2 knitwise, k1, p2sso used in this pattern.

The pdf-version of the pattern in both languages is available as a Ravelry download. Feel free to post a link of your finished work in the comments or send me a photo. All comments and questions are welcome.


* * *

Strickanleitung für Geschenkbeutel
Manchmal ist es nicht so wichtig, was man schenkt, aber wie es gemacht wird und natürlich die gute Wünsche und Gedanken dahinten. Es gibt noch genügend Zeit bis Weihnachten, um diesen kleinen Geschenkbeutel zu stricken und mit selbstgemachter Verpackung noch mehr Herzlichkeit schenken.
Mit dünnerem Garn oder Sockenwolle gestrickt wird der Beutel mit einem Durchmesser von etwa 8 cm. Und höher gestrickt bekommt man eine tolle Flaschenhülle.


Material:
• Dünneres Garn etwa 20 g (Maschenprobe 22-26 M/10 cm)
• Nadelspiel 3 mm
• Satinband

Strickschrift: siehe oben

*...* – wiederholen

A
48 M anschlagen.
Rd 1, 3 Alle Maschen links str
Rd 2 Alle Maschen rechts str
B
Rd 4 *1 M re, 1 U, 2 M re, 2 M re abheben, 1 M re, 2 abgehob M darüber ziehen, 2 M re, 1 U*
Rd 5, 7, 9 Alle Maschen rechts str
Rd 6 *2 M re, 1 U, 1 M re, 2 M re abheben, 1 M re, 2 abgehob M darüber ziehen, 1 M re, 1 U, 1 M re*
Rd 8 *3 M re, 1 U, 2 M re abheben, 1 M re, 2 abgehob M darüber ziehen, 1 U, 2 M re*
C
Rd 10 *4 M re, 1 U, 1 M re, 2 M re zus str, 1 M re*
Rd 11, 13, 14, 15 Alle Maschen rechts str
Rd 12 *1 M re, 2 M re überzog zus str, 1 M re, 1 U, 1 M re, 1 U, 1 M re, 2 M re zus str *
Runden 10 bis 15 sechs Mal oder bis auf gewünschte Höhe wiederholen.
D
Rd 16 *3 M re, 2 M re abheben, 1 M re, 2 abgehob M darüber ziehen, 2 M re*
Rd 17 *3 M li, 1 M re, 2 M li*
Rd 18 Alle Maschen rechts str
Runden 17 und 18 wechselnd über sieben Runden wiederholen.
Rd 19 *2 M re, 2 M re abheben, 1 M re, 2 abgehob M darüber ziehen, 1 M re*
Rd 20, 22 *2 M li, 1 M re, 1 M li*
Rd 21 Alle Maschen rechts str
Rd 23 *1 M re, 2 M re abheben, 1 M re, 2 abgehob M darüber ziehen*
Rd 24 *1 M li, 1 M re*
Rd 25 *2 M re zus str*
Die restlichen Maschen mit dem Endfaden zusammenziehen, beide Endfaden nach innen gut verknoten und in die Arbeit vernähen. Ein Satinband durch die Umschlag-Löcher der Runde 8 ziehen.


Ich würde gerne nach dieser Anleitung gestrickte Beutelchen hier vorstellen, ihr könnt ein Link zu eurem Blog als Kommentar posten oder Fotos per E-Mail schicken. Alle Fragen und Kommentare sind auch willkommen.

Monday, 25 October 2010

Cool Current wristwarmers pattern

Keep your hands warm with these wristwarmers like flowing currents when taking a stroll by the water. Or make a holiday gift – today is a good day to start. The cuffs or wristwarmers are an easy one skein project for softer yarns. My sample is knitted with pure alpaca wool Indiecita by Filcolana, colour 228.

Für deutsche Anleitung bitte runter scrollen!


Materials:
• Fingering weight yarn approximately 50 g/1.7 oz, 160 m/176 yds, gauge 26-30 stitches per 10 cm/4 in
• Double pointed needles 3 mm/US 2½
• Cable needle
• Stitch marker

Here is the knitting chart followed by written instructions:


*...* – repeat the pattern between asterisks
skp – slip 1, knit 1, pass slipped stitch over
c3f – cable 3 front

A
Cast on 56 stitches, divide sts onto 3 or 4 needles and join to work in the round. Place marker to indicate the beginning of round.
Rd 1 *k4, p4*
Not too convenient to handle the first rounds on double pointed needles, but it gets easier round by round. If the yarn is very slippery, use bamboo or wooden needles.
B
Rd 2 *k2, skp, k1, k2tog, yo, k1, yo*
Rd 3 knit all stitches
Repeat rounds 2 and 3 until work measures 31 rounds or 7 cm/3 in.
C
Rd 32 *slip next 3 stitches to a cable needle in front of work, k3, k3 from the cable needle, k2tog, yo*
Rd 33 *p3, k5*
That was the most difficult part, from now on it goes much faster towards the end.
D
Rd 34 *p3, k3, k2tog, yo*
Rd 35 *p3, k5*
Repeat rounds 34 and 35 until desired length.
Cast off all stitches (*p3, k5*). Bind off yarn and weave in the ends.
Knit the other wristwarmer the same way.
All done now – time to admire your work!

Notes:
• When using other gauges, increase or decrease the stitch count, keeping it a multiple of 8
• If not sure how long wristwarmers your yarn will be enough for, weigh the skein every now and then while knitting the first one and cast off when half of the skein is knitted
• Help for knitting abbreviations can be found in lots of places, e.g. Knittingfool, KnittingHelp, Vogue Knitting


I would love to show off your finished work, so feel free to post a link in the comments or send me a photo. All comments and questions are mostly appreciated, my e-mail address can be found on my profile. Thank you for taking the time to try it out!


* * *

Strickanleitung für Armstulpen
Ob für einen Spaziergang entlang des Ufers oder als Weihnachtsgeschenk vorgesehen – heute ist ein guter Tag mit diesen „fließenden“ Armstulpen anzufangen. Die Stulpen sind ziemlich einfach zu stricken und dafür braucht man nur ein Knäuel. Ich habe reine Alpakawolle, das Indiecita von Filcolana, Farbe 228 verwendet.


Material:
• Dünneres Garn etwa 50 g/160 m (Maschenprobe 26-30 M/10 cm)
• Nadelspiel 3 mm
• Zopf- oder Hilfsnadel

Strickschrift:


*...* – wiederholen

A
56 M anschlagen.
Rd 1 *4 M re, 4 M li*
B
Rd 2 *2 M re, 2 M re überzogen zus str, 1 M re, 2 M re zus str, 1 U, 1 M re, 1 U*
Rd 3 Alle Maschen rechts str
Runden 2 und 3 wiederholen, bis die Arbeit 7 cm oder 31 Runden hoch ist.
C
Rd 32 *3 M vor die Arbeit legen, 3 M re, 3 M der Hilfsnadel re str, 2 M re zus str, 1 U*
Rd 33 *3 M li, 5 M re*
D
Rd 34 *3 M li, 3 M re, 2 M re zus str, 1 U*
Rd 35 *3 M li, 5 M re*
Runden 34 und 35 bis auf gewünschte Länge wiederholen.
Alle Maschen abketten (*3 M li, 5 M re*), Garn abschneiden und in die Arbeit verstecken.
Die andere Stulpe genauso stricken und fertig!


Ich würde gerne nach dieser Anleitung gestrickte Stulpen hier vorstellen, ihr könnt ein Link zu eurem Blog als Kommentar posten oder Fotos mir per E-Mail schicken. Alle Fragen und Kommentare sind auch willkommen, meine E-Mail-Adresse ist in meinem Profil zu finden. Danke, daß ihr eure Zeit mit dieser Strickanleitung verbracht habt!